
How to Setup an ODBC Data Source
The first step in setting up an ODBC data source on your Windows machine is finding the Data Sources control panel option. On Windows XP and older machines, the Data Sources control panel is located in the Control Panel - Administrative Tools - Data Sources shortcut. For newer versions of Windows, to get to the Data Sources control panel, go to the Control Panel window, click the link to show the classic view, and then select Administrative Tools and Data Sources or search on data source in the control panel search box and options for setting up 32-bit and/or 64-bit data sources should return in the search results.
When setting up an ODBC data source on versions of Windows newer than XP that can be either 32-bit or 64-bit, it is important to know both the bit architecture (32-bit vs 64-bit) of the computer, and the bit architecture (32-bit vs 64-bit) of the ODBC driver. For example, if a Microsoft Access data source is being set up, and the Microsoft Access ODBC Driver installed on the machine is the 32-bit version of the driver, the 32-bit ODBC data source control panel should be used to set up the driver even if the computer is a 64-bit machine. Also, the bit architecture of the driver needs to match the bit architecture of RazorSQL. If the ODBC driver is 32-bit, the 32-bit version of RazorSQL must be used. If the ODBC driver is 64-bit, the 64-bit version of RazorSQL must be used.
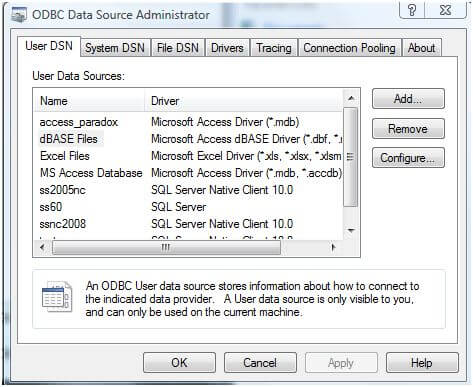
Here is a screen shot of the Data Sources control panel:
Once the Data Source window has been opened, the Add button can be clicked to add a new data source. A new window will display with all of the available ODBC drivers that are installed on your machine. Below is an example screen shot:
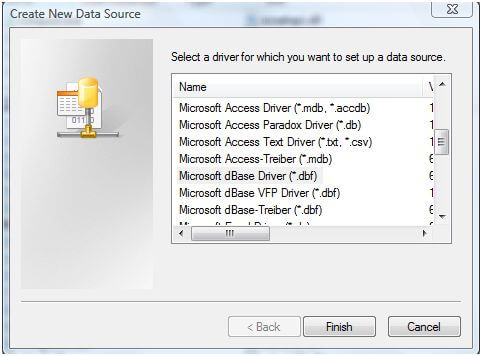
Look in the list for the type of database you want to set up a database for, for example, Microsoft Access Driver, Microsoft dBase Driver, SQL Server Native Client, etc. Once you find the appropriate option, click Finish.
At this point, another new window will display with database specific fields. For example, the SQL Server Native client will ask you the name, description, and SQL Server instance to connect to. The Microsoft Access driver will prompt you for the location of the .mdb Access file, etc. Enter the appropriate information, and remember what you named the data source. Click Finish.
At this point, the new data source is created. Depending on the data source, there may be an option to test the data source. It is a good idea to make sure the test is successful before trying to connect with RazorSQL.
To get connected with RazorSQL, open the connection wizard, select the appropriate database type, select ODBC as the connection type, and select the name of the ODBC data source you just created from the ODBC data source drop down.
