
Installing and Running MySQL on macOS / Mac OS X
The first step in setting up a MySQL database server on your Mac is
to download the MySQL installer. MySQL offers a free edition called
the MySQL Community Server. Click the link below to be taken to the
download page for the MySQL Community Server. In the "Select Operating System"
box, select macOS.
MySQL Community Server Download
Click the Download button next to the first option, the DMG archive download. At the time of this
writing, version 8 of the community server is the default download.
Once the DMG file is downloaded, double-click the DMG file to open the disk image. Once the disk image is opened, a new Finder window will appear with a .pkg file named something like the following:
mysql-X.X.XX-macos10.XX-x64_64.pkg
To install MySQL, do the following steps:
- 1. Double-click the .pkg file. This will launch the MySQL installer
- 2. Continue with the default options. At one point during the installation, the installer will ask whether to use strong password encryption or legacy password encryption. Some MySQL tools do not yet support strong password encryption. If the tools you are using to connect to MySQL do not support strong password encryption, select the legacy password encryption option. Note that RazorSQL supports strong password encryption.
- 3. Make sure to enter a password for the root MySQL user when prompted, and select the "Start MySQL Server once the installation is complete" option as well.
When the installer completes your MySQL server will be installed and running on your Mac. Once you have gotten to this point, you have a running MySQL server with one user - the root user - and the default database named mysql. Now it is time to connect to your MySQL database, create a user, and create a database.
To get connected to your MySQL database, you can use a tool like RazorSQL. RazorSQL can be downloaded from the Download link on the header at the top of this page. Once RazorSQL is downloaded and installed, do the following to connect to your MySQL database:
- 1. Select the Connections -> Add Connection Profile menu option
- 2. Select MySQL as the database type and click "Continue"
- 3. Enter any name you wish for the connection profile name and enter a name for the profile folder if desired
- 4. For the Login, enter root. For the password, enter the root password you gave to the MySQL installer
- 5. For the Host or IP Address, enter localhost
- 6. For the database name, enter mysql
- 7. Click Connect
At this point, you should be connected to your local MySQL database in RazorSQL.
After connecting, you can create a new database by doing the following:
- 1. Select the DB Tools - Create -> Create Database menu option
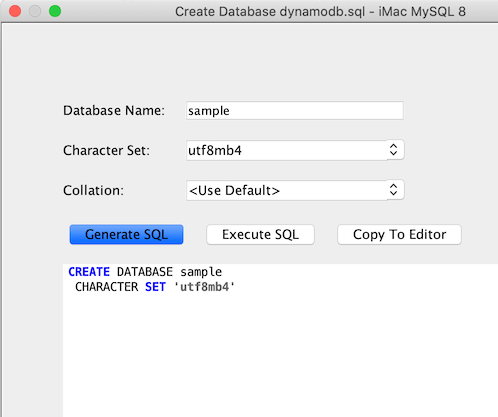
- 2. Enter a database name and then click "Generate SQL"
- 3. Click the Execute SQL button to create the database.
If you would like to manually create the MySQL database, execute the following command. This creates a new database named sample with UTF8 support:
create database sample character set 'utf8mb4'
Below is a screen shot of the create database window.
After creating the sample database, we can then create a new user. This will allow us to connect to the MySQL database without using the root user.
To create a new user, select the DB Tools -> Create -> Create User menu option. If you installed MySQL version 8, make sure the "Use MySQL 8 Syntax" box is selected.
If you want the user to be able to access your MySQL instance from other machines, make sure to check the "All Domains" option, or else click the "Select Domains" button to add specific ip addresses / hosts.
You will need to give the new user access to the sample database. To do this, either click the "Select Databases" button and add the sample database, or click the "All Databases" box to give the new user access to all databases.
Click the Generate SQL button to preview the commands for creating the user. Click the Execute SQL button to create the user. Below are example commands generated by the create user tool. These can be manually executed to create the user if not using RazorSQL or the create user tool:
CREATE USER 'testuser'@'localhost' IDENTIFIED BY 'testpass';
CREATE USER 'testuser'@'%' IDENTIFIED BY 'testpass';
GRANT ALL PRIVILEGES ON *.* TO 'testuser'@'localhost';
GRANT ALL PRIVILEGES ON *.* TO 'testuser'@'%';
flush privileges;
Below is a screen shot of the RazorSQL MySQL Create User tool.

After creating the new user, you can set up a new RazorSQL connection to the database using the new user instead of the root user. Once you are connected with your new user, below are some sample commands to create a new table, insert data into the table, and query data in the table.
CREATE TABLE department (
	dnumber    INT NOT NULL,
	dname      VARCHAR(25) NOT NULL,
	PRIMARY KEY (dnumber)
);

insert into department values (1, 'Headquarters');
insert into department values (4, 'Administration');
insert into department values (5, 'Research');

select * from department;
The above commands can be executed manually, or you can use the following tools in RazorSQL
to create the table and insert the data using visual tools:
RazorSQL MySQL Create Table Tool
RazorSQL MySQL Table Editor
